 By Emma Hartley, Food Editor
Reviewed & updated September 2026
Birria tacos took over social media for good reason — crispy, cheese-crusted tortillas wrapped around deeply seasoned, fall-apart beef, served with a rich dipping consommé for the ultimate dunk. This homemade version breaks the process into simple stages so it's approachable for a weekend cook, with a make-ahead-friendly braise that does most of the work for you.
 What you’ll find insideCurated by Emma · 10 min read
What Makes Birria Tacos Different
Traditional birria is a slow-braised meat stew (originally goat, commonly beef in modern home versions) built on a base of dried chiles, tomatoes, and warm spices. The braising liquid becomes the consommé — a deeply flavorful broth that does double duty as a dip for the finished tacos and a base you can sip alongside them. The tacos themselves get dipped in the fat that rises to the top of that consommé before hitting a hot skillet, which is what creates the signature crispy, slightly red-tinted, cheese-crusted shell.
[TAKE] The step that makes or breaks the crispy shell: dip the tortilla in the reddish fat layer that rises to the top of the chilled consommé, not the broth itself. That thin fat layer is what fries the tortilla into a crisp, flavorful shell in the skillet — using plain broth just makes it soggy instead.
Easy Birria Tacos with Consommé
Slow-braised, chile-seasoned beef folded into crispy, cheese-crusted tacos, served with a rich dipping consommé.
☆☆☆☆☆
Ingredients
- 3 lbs beef chuck roast, cut into large chunks
- 4 dried guajillo chiles, stemmed and seeded
- 2 dried ancho chiles, stemmed and seeded
- 2 dried chiles de árbol (optional, for heat)
- 1 white onion, halved
- 6 garlic cloves
- 2 Roma tomatoes
- 2 bay leaves
- 1 tsp dried oregano
- 1 tsp ground cumin
- 1 tsp smoked paprika
- 1/2 tsp ground cinnamon
- 3 whole cloves
- 4 cups beef broth
- 2 tbsp apple cider vinegar
- Salt to taste
- 16 corn tortillas
- 2 cups shredded Oaxaca or mozzarella cheese
- 1/2 cup chopped white onion, for topping
- 1/2 cup chopped cilantro, for topping
- Lime wedges, for serving
Instructions
- Step 1. Toast the dried chiles in a dry skillet over medium heat for 30-60 seconds per side until fragrant but not burnt. Soak them in hot water for 15 minutes until softened.
- Step 2. Blend the softened chiles with the halved onion, garlic, tomatoes, oregano, cumin, smoked paprika, cinnamon, cloves, 1 cup of the beef broth, and vinegar until smooth. Season with salt.
- Step 3. Season the beef chunks generously with salt, then sear in a large heavy pot over high heat until browned on all sides, working in batches if needed.
- Step 4. Return all beef to the pot, pour the blended chile mixture over it, add the bay leaves and remaining 3 cups beef broth. Bring to a simmer.
- Step 5. Cover and simmer on low heat (or transfer to a 300°F oven) for 3 hours, or until the beef shreds easily with a fork.
- Step 6. Remove the beef and shred it with two forks, discarding any large fat pieces. Skim the layer of reddish fat that rises to the top of the braising liquid and reserve it separately — this is the consommé and its fat.
- Step 7. Strain the remaining braising liquid to make the consommé; taste and adjust salt.
- Step 8. Dip a tortilla in the reserved fat layer, place it in a hot skillet, top with shredded cheese and a portion of the shredded beef, fold in half, and cook 2-3 minutes per side until crispy and the cheese has melted.
- Step 9. Serve the tacos hot alongside small bowls of warm consommé, topped with chopped onion, cilantro, and a squeeze of lime.
Ingredient Notes
Beef chuck roast is the right cut here — it has enough marbling and connective tissue to become fall-apart tender over the 3-hour braise, unlike leaner cuts that would dry out. Short ribs are a good substitute if you want an even richer result.
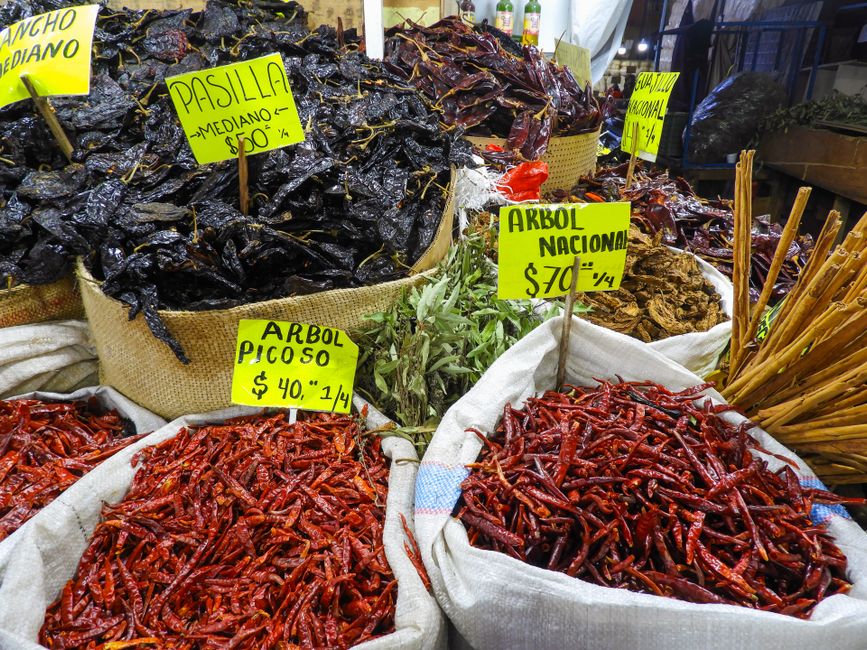
Dried chiles are non-negotiable for authentic flavor — guajillo brings mild fruitiness and color, ancho adds a deep, slightly sweet earthiness, and chiles de árbol add heat if you want it. Most well-stocked grocery stores carry these in the international aisle; if yours doesn't, they're easy to find online.
Tips for the Best Results
Sear the beef properly before braising. Don't skip this or rush it — a real, browned crust on the meat builds a layer of flavor the braise can't replicate on its own.
Let the consommé rest before skimming. After the braise, let the pot sit undisturbed for 10-15 minutes (or refrigerate briefly) so the fat has time to rise clearly to the top, making it much easier to separate from the broth beneath it.
Use a well-seasoned or nonstick skillet for the tacos. The cheese and fat can stick to a bare cast iron pan that isn't properly seasoned — a nonstick or well-seasoned surface makes flipping the folded tacos much easier.
Don't overfill the tortillas. A generous but controlled amount of meat and cheese folds and crisps evenly; overstuffed tacos tend to fall apart or crisp unevenly in the skillet.
Variations
Chicken birria: substitute bone-in chicken thighs for a lighter version with a shorter braise time (about 45-60 minutes instead of 3 hours).
Birria ramen: ladle the leftover consommé over cooked ramen noodles with shredded birria beef, sliced scallions, and a soft-boiled egg for a fusion twist.
Birria quesadillas: skip the folding technique and make a full quesadilla with a flour tortilla for a faster weeknight version using the same beef and cheese.
Spicier version: increase the chiles de árbol or add a diced chipotle in adobo to the blender mixture for deeper smoky heat.
Storage and Reheating
The shredded beef and consommé both keep well in the refrigerator for up to 4 days in separate airtight containers, and the flavor often improves after a day as the spices continue to meld. Both freeze well for up to 3 months — thaw overnight in the refrigerator before reheating.
Reheat the beef and consommé gently on the stovetop over low heat rather than the microwave, which can dry out the shredded meat unevenly. Assemble and crisp the tacos fresh right before serving — they don't hold or reheat well once fully assembled, since the crispy shell softens quickly.
The Takeaway
Birria tacos have a reputation for being restaurant-only, but the process is really just a long, low-effort braise followed by a quick assembly step. Once the beef and consommé are done — which can happen a day or two ahead — the actual taco-making takes about 20 minutes for a full batch. The result is worth the wait: crispy, cheese-crusted tacos with a dipping broth that makes every bite better than the last.
Frequently Asked Questions
Can I make birria tacos in a slow cooker?
Yes — sear the beef first in a skillet, then transfer everything to a slow cooker and cook on low for 7-8 hours or high for 4-5 hours, until the beef shreds easily.
What's the difference between birria and quesabirria?
They're essentially the same dish — quesabirria specifically emphasizes the cheese ("queso") element, referring to the cheese-crusted, dipped-and-fried taco version, while "birria" more broadly can also refer to the stew served in a bowl without the taco preparation.
Can I use a different cut of beef?
Chuck roast or short ribs both work well due to their marbling and connective tissue. Leaner cuts like sirloin will cook faster but tend to come out drier and less tender after a long braise.
Do I have to fry the tacos, or can I make them without the crispy step?
You can skip the dip-and-fry step and simply warm the tortillas, fill them with beef and cheese, and serve alongside the consommé — you'll lose the signature crispy shell, but it's still a delicious, faster version.
Read next
Further reading & trusted sources
From our test kitchen
Letting the braising liquid rest for 10-15 minutes before skimming is what actually separates a clean consommé from a greasy one — rushing straight from pot to strainer means the fat hasn’t had time to fully rise and separate, so more of it ends up back in the broth. Dipping the tortilla in that skimmed fat layer, not the broth itself, is the specific step that fries the shell crispy in the skillet; using plain broth just makes the tortilla soggy.
Emma thinks a recipe has failed if it needs a long backstory before the ingredients — so hers get straight to the point, with the small technique notes that actually change how a dish turns out. She leads The Nourish Kitchen’s recipes and food guides, writing each one to work in a real, busy kitchen rather than a photo studio. AI tools help with research and drafting, and a human checks every recipe for clarity and food safety before it publishes. Nutrition figures are honest estimates, never guarantees.