 By Emma Hartley, Food Editor
Reviewed & updated September 2026
Air fryer chicken breast has a reputation problem — and honestly, it's earned, because most recipes overcook it. But when you nail the temperature and timing, air fryer chicken breast is the juiciest, most reliably cooked weeknight protein you can make in under 20 minutes.
This guide covers the method, the temperature, and the details that actually matter so you stop getting dry, rubbery chicken.
 What you’ll find insideCurated by Emma · 9 min read
- Juicy Air Fryer Chicken Breast
- Why Most Air Fryer Chicken Breast Goes Wrong
- The Even Thickness Problem
- The Temperature and Timing Sweet Spot
- The Rest Step (Non-Negotiable)
- Seasoning Variations
- What to Serve With It
- Troubleshooting
- Storage and Reheating
- The Takeaway
- Related articles
- Further reading & trusted sources
Juicy Air Fryer Chicken Breast
Perfectly seasoned air fryer chicken breast that stays juicy every time — ready in under 20 minutes with a simple spice rub.
☆☆☆☆☆
Ingredients
- 2 boneless skinless chicken breasts (6-8 oz each)
- 1 tbsp olive oil
- 1 tsp garlic powder
- 1 tsp onion powder
- 1 tsp smoked paprika
- 1/2 tsp dried oregano
- 1/2 tsp salt
- 1/4 tsp black pepper
- Optional: pinch of cayenne for heat
Instructions
- Step 1. Pat chicken breasts completely dry with paper towels — this is the most important step for good browning.
- Step 2. Pound the thicker end of each breast lightly with a mallet or rolling pin until the breast is an even 3/4-inch thickness throughout.
- Step 3. Rub olive oil all over the chicken, then coat evenly with the combined spices.
- Step 4. Preheat air fryer to 375°F for 3 minutes.
- Step 5. Place chicken in a single layer in the basket — do not overlap.
- Step 6. Cook at 375°F for 7 minutes, flip, then cook another 5 to 7 minutes until internal temperature reads 165°F on an instant-read thermometer.
- Step 7. Remove from air fryer and REST for 5 minutes before slicing. This is non-negotiable for juicy chicken.
Why Most Air Fryer Chicken Breast Goes Wrong
The air fryer circulates hot, dry air at high speed — which is great for crisping, but unforgiving with lean protein. Most recipes set the temperature too high (400°F+) or cook by time rather than temperature, so the chicken keeps cooking past 165°F into dry territory.
Three things fix this: even thickness, the right temperature (375°F, not 400°F), and a thermometer instead of guessing.
The Even Thickness Problem
Chicken breasts are thicker at one end and thin at the other, which means the thin part overcooks by the time the thick part is done. The fix takes 30 seconds: cover the breast with plastic wrap and pound the thick end gently until the whole thing is roughly even. You don't need a meat mallet — a rolling pin or the bottom of a heavy pan works fine.
Alternatively, butterfly the breast (slice horizontally through the thicker side) for two thinner pieces that cook in about 10 minutes total.
The Temperature and Timing Sweet Spot
375°F for 12 to 14 minutes is the sweet spot for a standard 6 to 8 oz chicken breast. At 400°F the outside dries before the inside is properly cooked through. At 350°F it takes too long and the skin (if present) doesn't crisp.
Every air fryer runs slightly differently — a basket-style and an oven-style air fryer can have a 5 to 10 degree real-world difference at the same setting. This is why the internal temperature is what matters. Pull the chicken at exactly 165°F.
The Rest Step (Non-Negotiable)
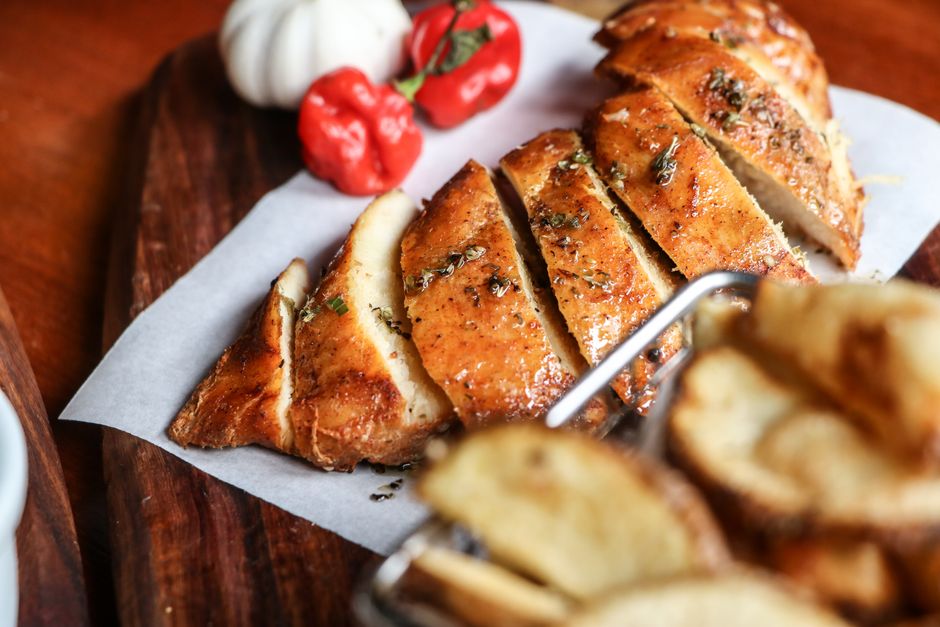
After the chicken comes out, let it rest on a cutting board for 5 minutes before cutting. This is the most skipped and most important step. During cooking, the muscle fibers contract and push moisture toward the center. Resting allows those fibers to relax and reabsorb that moisture. Cut immediately and the juice runs out onto the board. Rest it and it stays in the meat.
5 minutes is enough. 10 minutes is fine too if you're plating other things.
Seasoning Variations
The base spice rub in this recipe (garlic powder + onion powder + smoked paprika + oregano) is a go-to that works with almost any cuisine. Here are four quick variations:
Italian herb: Replace smoked paprika with dried Italian seasoning, add a squeeze of lemon after cooking.
Lemon pepper: Use only garlic powder + generous black pepper + lemon zest. Finish with fresh lemon juice.
Taco seasoning: Sub 1 tsp cumin + 1/2 tsp chili powder + 1/2 tsp garlic powder + pinch of cayenne. Excellent for burrito bowls.
Honey garlic glaze: After flipping at the halfway point, brush with a mix of 1 tbsp honey + 1 tsp soy sauce + 1/2 tsp garlic powder. The glaze caramelizes in the last 5 to 6 minutes.
What to Serve With It
Air fryer chicken breast is one of the most versatile proteins because it goes with almost everything and doesn't compete with other flavors:
- Roasted vegetables (broccoli, asparagus, or sweet potatoes can go in the air fryer right after the chicken)
- Rice or quinoa with a simple herb sauce
- A big salad — the chicken slices beautifully over greens
- Pasta — chop it and toss with marinara or pesto
- Grain bowls — pair with farro, chickpeas, roasted red peppers
Meal prep note: cooked air fryer chicken breast stores well in the fridge for 4 days and reheats without drying out if you slice it and microwave with a damp paper towel over the top for 45 seconds.
Troubleshooting
Still dry? Check your thermometer calibration. Most overcooking comes from a thermometer reading high, causing people to pull the chicken later than needed. Test in boiling water — it should read 212°F.
Pale exterior? The oil is key. Dry chicken doesn't brown. Make sure each breast is coated in oil before adding the spices, and don't skip the preheat.
Smoking air fryer? A small amount of oil dripping is normal. If your air fryer smokes heavily, add a tablespoon of water to the drawer below the basket — it stops the smoking without affecting cooking.
Storage and Reheating
Fridge: Store cooked chicken breast in an airtight container for up to 4 days.
Freezer: Slice before freezing for faster, more even thawing. Freeze flat in a single layer, then transfer to a bag. Keeps well for up to 3 months.
Reheating: For best results, reheat in the air fryer at 350°F for 3 to 4 minutes rather than the microwave. The microwave works too — use a damp paper towel over the plate and heat in 30-second bursts to avoid rubbery texture.
The Takeaway
The difference between dry and juicy air fryer chicken breast comes down to four things: pound to even thickness, cook at 375°F (not 400°F), pull at exactly 165°F with a thermometer, and rest for 5 minutes before cutting. Do those four things and you'll get consistently juicy, well-seasoned chicken every single time.
Frequently Asked Questions
Do I need to preheat my air fryer?
Yes — a 3-minute preheat at 375°F helps the chicken start cooking immediately on contact, which produces better browning and more even results. Skipping preheat adds 1 to 2 minutes of real cook time and can produce a less crisp exterior.
Can I cook frozen chicken breast in the air fryer?
Yes, but add 5 to 8 minutes to the cook time and skip the oil until the chicken partially thaws (about 5 minutes in). The internal temperature rule still applies — 165°F is the only reliable guide.
Can I use chicken thighs with this recipe?
Yes. Boneless skinless thighs cook at the same temperature but only take 10 to 12 minutes because they're thinner. They're also more forgiving than breasts because thigh meat has more fat and stays juicy even slightly past 165°F.
Why is my air fryer chicken rubbery?
Rubbery texture usually means the chicken was cooked past 165°F, then chilled and reheated without moisture. For leftover chicken, always add moisture when reheating and heat gently rather than at full power.
Read next
Related articles
- Korean Ground Beef Bowl (15-Minute Dinner)
- Teriyaki Salmon Rice Bowl
- Cheesy Baked Ziti
- Easy Sheet-Pan Salmon and Vegetables
- One-Pan Garlic Butter Chicken and Veggies
- Lemon Garlic Shrimp Pasta in 25 Minutes
Further reading & trusted sources
Where recipes usually go wrong
The single most reliable air fryer chicken fix is cooking to temperature rather than to time — every air fryer runs slightly differently, and the difference between 160°F and 175°F internal temperature is the difference between juicy and dry. Resting for five minutes after pulling the chicken lets the contracted muscle fibers reabsorb the juices that moved to the center during cooking, which is why cutting immediately always results in juice running out onto the board.
Emma thinks a recipe has failed if it needs a long backstory before the ingredients — so hers get straight to the point, with the small technique notes that actually change how a dish turns out. She leads The Nourish Kitchen’s recipes and food guides, writing each one to work in a real, busy kitchen rather than a photo studio. AI tools help with research and drafting, and a human checks every recipe for clarity and food safety before it publishes. Nutrition figures are honest estimates, never guarantees.