 By Emma Hartley, Food Editor
Reviewed & updated September 2026
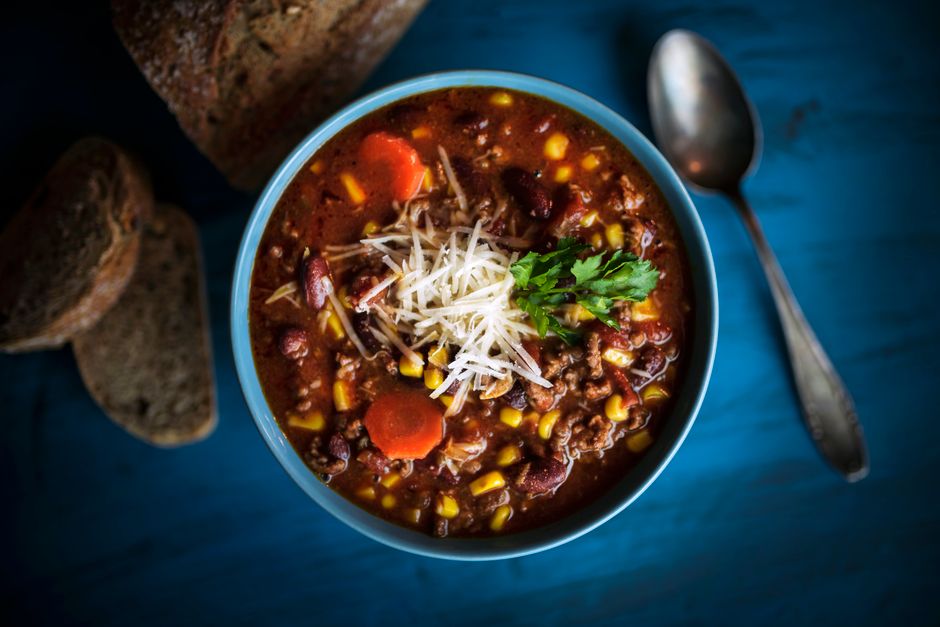
A big pot of classic beef chili is pure comfort: rich, hearty, and deeply savoury, with tender beans, a thick tomato base, and just the right amount of warmth from the spices. It's the meal I make when I want the house to smell incredible and the leftovers to last — it feeds a crowd, gets better the next day, and is endlessly customizable with toppings.
This is a reliable, from-scratch chili that doesn't need a packet — just a handful of pantry spices and a little simmering time to develop big, cosy flavour.
 Quick navigationCurated by Emma · 7 min read
Why you'll love this recipe
- Feeds a crowd. One pot, plenty of bowls.
- Even better tomorrow. The flavour deepens overnight.
- Customisable. Pile on whatever toppings you love.
Brown the beef and bloom the spices — don't skip either
Great chili is all about building deep, savoury flavour, and two early steps do most of that work — skip them and you get a thin, one-note chili no matter how long it simmers. First, properly brown the beef. Don't just cook it until it loses its pink; let it sit in the hot pot and develop genuine brown, caramelised bits (that's the Maillard reaction), which create the rich, meaty depth that defines a good chili. Crowding or constantly stirring just steams the meat grey — give it space and a little patience. (Drain excess fat afterward if there's a lot.) Second, bloom the spices. After softening the onion and pepper, add the chili powder, cumin, and paprika and toast them in the hot pot for about a minute before the liquids go in. Heating ground spices in fat releases their full aroma and flavour; dumped straight into the tomatoes they stay dusty and muted. Those browned bits stuck to the bottom of the pot, by the way, are pure flavour — the tomatoes and broth will dissolve them right back in. Browned beef plus bloomed spices is the savoury foundation everything else builds on.
Tips for the best results
Brown the beef well for the deepest flavour, and bloom the spices in the pot for a minute before adding the liquids. Let it simmer long enough to thicken and meld — at least 30 minutes, longer if you have time. A spoonful of cocoa or a splash of coffee adds surprising depth.
Classic Beef Chili
A rich, hearty beef and bean chili with a thick tomato base and warm spices.
☆☆☆☆☆
Ingredients
- 1.5 lb (680 g) ground beef
- 1 onion, diced
- 1 bell pepper, diced
- 4 cloves garlic, minced
- 2 tbsp chili powder
- 1 tbsp cumin
- 1 tsp smoked paprika
- 1 tsp oregano
- 1 (28 oz) can crushed tomatoes
- 2 (15 oz) cans beans (kidney and black), drained
- 1 cup beef broth
- 1 tsp salt, toppings to serve
Instructions
- Step 1. Brown the ground beef in a large pot over medium-high heat, breaking it up. Drain excess fat.
- Step 2. Add the onion and bell pepper and cook 4 minutes until softened. Stir in the garlic and all the spices and cook 1 minute until fragrant.
- Step 3. Add the crushed tomatoes, beans, broth, and salt. Stir well and bring to a simmer.
- Step 4. Lower the heat and simmer, partly covered, for 30-45 minutes, stirring occasionally, until thick and flavorful.
- Step 5. Taste and adjust seasoning. Serve hot with cheese, sour cream, green onion, and tortilla chips.
Low and slow, plus a secret-ingredient finish
Two things take this chili from good to memorable. First, give it time. Thirty minutes of simmering is the minimum, but chili genuinely rewards a longer, lazier cook — the longer it bubbles (gently, partly covered), the more the flavours meld, the meat tenderises, and the sauce thickens and deepens. If it's looking thin, simmer it uncovered to reduce, or mash a few of the beans against the pot to thicken it naturally. Second, reach for a secret ingredient or two. This is where home cooks make chili taste like it has a hidden depth nobody can quite place: a spoonful of unsweetened cocoa powder or a square of dark chocolate adds rich, earthy depth (it doesn't taste of chocolate, just more), and a splash of brewed coffee does the same. A little brown sugar balances the acidity of the tomatoes, and a dash of vinegar or lime at the end brightens everything. Add these in small amounts and taste as you go. And like most braises, chili is genuinely better the next day — make it ahead if you can, let the flavours settle overnight, and it'll taste even richer reheated.
Make it your own
Make it spicier with diced jalapeño or cayenne, add a can of corn, or use ground turkey for a lighter version. For vegetarian chili, skip the meat and add extra beans, lentils, and chopped sweet potato.
Frequently asked questions
Can I make it in a slow cooker? Yes — brown the beef and aromatics first (don't skip this for flavour), then transfer everything and cook on low for 6-8 hours.
Why is my chili watery? Simmer it uncovered longer to reduce, or mash some of the beans to thicken it naturally.
How long does it keep? Up to 4 days refrigerated and 3 months frozen. It's a fantastic make-ahead and meal-prep meal that improves overnight.
What's a secret ingredient to make chili taste better? A spoonful of cocoa powder or a splash of coffee adds earthy depth, a little brown sugar balances the acidity, and a dash of vinegar or lime at the end brightens it. Add small amounts and taste.
Why brown the beef first? Browning develops deep, caramelised, savoury flavour (the Maillard reaction) that you can't get by just cooking the meat until grey. Give it space in the hot pot and don't over-stir.
Read next




Related articles
- Creamy White Chicken Chili (Easy One-Pot Recipe)
- Classic Chicken Noodle Soup from Scratch
- Marry Me Chicken (Creamy Sun-Dried Tomato)
- “Juicy Air Fryer Chicken Breast (Never Dry Again)”
- Korean Ground Beef Bowl (15-Minute Dinner)
- Creamy Chicken Alfredo Pasta
Further reading & trusted sources
The trick that actually works
Chili tastes thin when the beef is boiled rather than browned. Get a real sear on the meat first and don’t rush it — the fond stuck to the bottom of the pot is where most of the flavour lives.
Emma thinks a recipe has failed if it needs a long backstory before the ingredients — so hers get straight to the point, with the small technique notes that actually change how a dish turns out. She leads The Nourish Kitchen’s recipes and food guides, writing each one to work in a real, busy kitchen rather than a photo studio. AI tools help with research and drafting, and a human checks every recipe for clarity and food safety before it publishes. Nutrition figures are honest estimates, never guarantees.